<?xml version="1.0" encoding="utf-8"?><feed xmlns="http://www.w3.org/2005/Atom" ><generator uri="https://jekyllrb.com/" version="4.4.1">Jekyll</generator><link href="/feed" rel="self" type="application/atom+xml" /><link href="/" rel="alternate" type="text/html" /><updated>2026-02-11T09:04:12-06:00</updated><id>/feed</id><title type="html">Jumptuck</title><entry><title type="html">How to Fix Audio Pop with Pipewire on Linux</title><link href="/blog/2026-02-10-linux-pipewire-audio-pop/" rel="alternate" type="text/html" title="How to Fix Audio Pop with Pipewire on Linux" /><published>2026-02-10T20:00:00-06:00</published><updated>2026-02-10T20:00:00-06:00</updated><id>/blog/linux-pipewire-audio-pop</id><content type="html" xml:base="/blog/2026-02-10-linux-pipewire-audio-pop/"><![CDATA[<p>This week I began using my laptop as a battlestation by connection external
monitors, keyboard, mouse, microphone, and speakers. The only real headache was
that every time I received a chat notification there was a loud popping sound
from the speakers, then the audio playback, then another loud popping sound. A
bit of searching turned up the root cause–power saving in the sound system–but
finding the fix was a bit tricky.</p>

<h2 id="obvious-solutions-that-dont-work">Obvious Solutions that Don’t Work</h2>

<p>There are a few obvious solutions that didn’t work for me. The first is to
disable power-saving in <a href="https://wiki.archlinux.org/title/TLP">the TLP daemon</a>.
However, running <code class="language-plaintext highlighter-rouge">systemctl status tlp</code> shows that there is no <code class="language-plaintext highlighter-rouge">tlp.service</code>
enabled.</p>

<p>Several search results pointed to the module itself causing the popping, once
again due to power-saving. However, when <a href="https://wiki.archlinux.org/title/Power_management#Audio">investigating the
module</a>, I found that
<code class="language-plaintext highlighter-rouge">power_save</code> is already set to <code class="language-plaintext highlighter-rouge">0</code> for the <code class="language-plaintext highlighter-rouge">snd_hda_intel</code> module.</p>

<p>I also found several references to <a href="https://wiki.archlinux.org/title/Advanced_Linux_Sound_Architecture/Troubleshooting#Power_saving">disable
power-saving</a>
using an <code class="language-plaintext highlighter-rouge">alsa-base.conf</code> overlay file. However, using this approach had no
effect.</p>

<h2 id="solution-disable-alsa-power-saving-using-pipewire-and-wireplumber">Solution: Disable Alsa Power Saving Using Pipewire and Wireplumber</h2>

<p>I found the solution through a combination of the Pipewire and Arch docs.</p>

<p>First, <a href="https://pipewire.pages.freedesktop.org/wireplumber/daemon/configuration/alsa.html#rules">the example alsa configuration in the Pipewire
docs</a>
shows how to set the <code class="language-plaintext highlighter-rouge">suspend-timeout-seconds</code> value. While the example shows a
setting of <code class="language-plaintext highlighter-rouge">5</code>, when researching the issue I previously discovered that setting
it to <code class="language-plaintext highlighter-rouge">0</code> disables power-saving.</p>

<p>The Arch docs show <a href="https://wiki.archlinux.org/title/WirePlumber#Disable_a_device/node">how to add a
Wireplumber</a>
overlay to set your preferred alsa values. We need to create a directory, then
set the overlay file.</p>

<ol>
  <li>
    <p>Create the Wireplumber directory</p>

    <div class="language-plaintext highlighter-rouge"><div class="highlight"><pre class="highlight"><code>sudo mkdir -p /etc/wireplumber/wireplumber.conf.d
</code></pre></div>    </div>
  </li>
  <li>
    <p>Add the overlay file</p>

    <div class="language-plaintext highlighter-rouge"><div class="highlight"><pre class="highlight"><code>sudo touch /etc/wireplumber/wireplumber.conf.d/disable-suspend.conf
</code></pre></div>    </div>
  </li>
  <li>
    <p>Add configuration to the overlay file</p>

    <div class="language-plaintext highlighter-rouge"><div class="highlight"><pre class="highlight"><code>monitor.alsa.rules = [
  {
    matches = [
      # This matches the value of the 'node.name' property of the node.
      {
        node.name = "~alsa_output.*"
      }
    ]
    actions = {
      # Apply all the desired node specific settings here.
      update-props = {
        session.suspend-timeout-seconds = 0
      }
    }
  }
]
</code></pre></div>    </div>
  </li>
  <li>
    <p>Restart Wireplumber</p>

    <div class="language-plaintext highlighter-rouge"><div class="highlight"><pre class="highlight"><code>systemctl --user restart wireplumber
</code></pre></div>    </div>
  </li>
</ol>

<p>You will hear a few pops when Wireplumber restarts (and when first booting your
machine), but the pops at the beginning and end of each audio output will be
resolved.</p>

<h2 id="tricky-configuration">Tricky Configuration</h2>

<p>This one was a bit tricky to track down, mostly because I was unable to find a
default setting for this on the laptop itself. I would prefer that a default
setting be easily found for each configurable option. Either that’s not how
Wireplumber works, or I was just looking in the wrong place. But now I can work
for hours on end with pop-free audio!</p>]]></content><author><name>Mike Szczys</name></author><category term="Linux" /><category term="Pipewire" /><category term="alsa" /><category term="Audio" /><summary type="html"><![CDATA[A harsh popping sound at the start and end of audio playback in Linux was driving me crazy. This is on a Dell XPS13 laptop and the issue is the power saving subsystem. Here's how to resolve the issue using Pipewire (Wireplumber) on Arch Linux.]]></summary><media:thumbnail xmlns:media="http://search.yahoo.com/mrss/" url="/wp-content/uploads/2026/02/laptop-audio-jack.png" /><media:content medium="image" url="/wp-content/uploads/2026/02/laptop-audio-jack.png" xmlns:media="http://search.yahoo.com/mrss/" /></entry><entry><title type="html">Conditional Configuration for Hyprland</title><link href="/blog/2025-05-26-hyprland-conditional-config/" rel="alternate" type="text/html" title="Conditional Configuration for Hyprland" /><published>2025-05-26T19:00:00-05:00</published><updated>2025-05-26T19:00:00-05:00</updated><id>/blog/hyprland-conditional-config</id><content type="html" xml:base="/blog/2025-05-26-hyprland-conditional-config/"><![CDATA[<p>I like to track <a href="https://jumptuck.com/blog/2023-11-14-dotfiles-exposed/">all of my Linux dotfiles in a single
repository</a> so that it’s
easy to restore state, even when completely reinstalling the operating system.
Recently, I migrated from Linux Mint running i3 desktop to Linux Arch running
<a href="https://hyprland.org/">Hyprland</a>. There was a fair amount of customization work
which went pretty well and now that I have stable installs on my laptop and
desktop computers I want to add the new dotfiles to my revision control. This is
where the gotcha happened. Hyprland has no mechanism for conditionally including
configuration, providing some unique challenges to my preferred revision
control.</p>

<p>After mulling it over for a few weeks, I’ve come up with a passable approach to
conditionally including Hyprland config based on the system hostname. My
technique is roughly as follows:</p>

<ol>
  <li>Source a non-existent <code class="language-plaintext highlighter-rouge">custom-by-hostname.conf</code> file.</li>
  <li>Add a <code class="language-plaintext highlighter-rouge">custom-$HOSTNAME.conf</code> file for each of your computers.</li>
  <li>Use Hyprland to create a symlink for the correct host at startup.</li>
  <li>Bonus: configure Hypridle for different host behavior.</li>
</ol>

<p>Let’s jump in!</p>

<h2 id="tracking-hyprland-custom-config">Tracking Hyprland Custom Config</h2>

<p>I installed Hyprland using the excellent <a href="https://github.com/mylinuxforwork/dotfiles">ml4w-dotfiles
project</a> by Stephan Raabe. It’s a
one stop shop to begin your Hyprland experience with a well-tuned desktop
environment. The project even has customization in mind, including the
<code class="language-plaintext highlighter-rouge">~/dotfiles/.config/hypr/conf/custom.conf</code> file for this very purpose.</p>

<p>Add a line to <code class="language-plaintext highlighter-rouge">~/dotfiles/.config/hypr/conf/custom.conf</code> to track a non-existent
configuration file.</p>

<div class="language-plaintext highlighter-rouge"><div class="highlight"><pre class="highlight"><code># Import settings unique to this computer
# This file will be symlinked by Hyprland at start.
source = ~/.config/hypr/conf/custom-by-hostname.conf
</code></pre></div></div>

<h2 id="add-custom-config-to-hostname-specific-files">Add Custom Config to Hostname-Specific Files</h2>

<p>Now add custom config to files that use the hostname of each computer. For now
you may simply leave them blank but they need to exist. Here I’ve created two
files:</p>

<div class="language-plaintext highlighter-rouge"><div class="highlight"><pre class="highlight"><code>touch ~/dotfiles/.config/hypr/conf/custom-krusty.conf
touch ~/dotfiles/.config/hypr/conf/custom-nelson.conf
</code></pre></div></div>

<h2 id="use-hyprland-to-create-symlinks">Use Hyprland to Create Symlinks</h2>

<p>The key to pull it all together is to create a symbolic link using the
non-existent filename. But we won’t crate the symlink, Hyprland will.</p>

<p>At the top of the <code class="language-plaintext highlighter-rouge">~/.config/hypr/hyprland.conf</code> file, add this directive
to create the symlink:</p>

<div class="language-plaintext highlighter-rouge"><div class="highlight"><pre class="highlight"><code># Import Hyprland settings unique to this computer
# This automatically symlinks the correct file based on hostname
exec-once = ln -s "./custom-$HOSTNAME.conf" ~/dotfiles/.config/hypr/conf/custom-by-hostname.conf &amp;&gt; /dev/null
</code></pre></div></div>

<p>There are several things to note about the above command. First, Hyprland will
try to create the symbolic every time you login. There’s really no harm in this,
we’re piping both stout and sterr to null so that there are no error messages
when the symlink already exists. Second, the symlink source is relative to the
destination location, so we don’t need a full path. Third, <code class="language-plaintext highlighter-rouge">$HOSTNAME</code> makes an
assumption that your shell has a matching environment variable. If bash is your
preferred shell this will work, it may not for other shells.</p>

<h2 id="bonus-conditional-config-for-hypridle">Bonus: Conditional config for Hypridle</h2>

<p>I want my laptop to automatically suspend after a certain period of time, so
it’s nice that ml4w-dotfiles sets this up to happen after 30 minutes. However, I
don’t want my main desktop to ever suspend. This provides another unique
conditional config challenge as hypridle configuration cannot be stored in the
custom.conf file we used above.</p>

<p>The solution I found for this is to change the “listener” behavior based on the
hostname. Here’s the entire block from <code class="language-plaintext highlighter-rouge">~/.config/hypr/hypridle.conf</code>:</p>

<div class="language-plaintext highlighter-rouge"><div class="highlight"><pre class="highlight"><code>listener {
    timeout = 1800
    on-timeout = [ $HOSTNAME == "krusty" ] || systemctl suspend
}
</code></pre></div></div>

<p>The listener is still created with the same 30 minute timeout. However, the
command that is run on this timeout period changes based on the hostname of the
computer. I do not want to suspend my desktop (which is also a home server), so
I start off the command checking if the hostname is <code class="language-plaintext highlighter-rouge">krusty</code>. If that evaluates
to true, the condition is satisfied and execution will end. However, any other
host name will evaluate to false, so execution will move on to the “or” part of
the command after the <code class="language-plaintext highlighter-rouge">||</code> operators. In this way, Krusty never suspends, but
Nelson does. Bob’s your uncle and my laptop battery life has never been better.</p>

<h2 id="check-out-my-dotfiles">Check Out My dotfiles</h2>

<p>Admittedly, ml4w-dotfiles uses a different approach to dotfile tracking than I
do. This setup is a bit less automatic than it used to be… I may need to do a
<code class="language-plaintext highlighter-rouge">git restore</code> after installing an ml4w-dotfiles update. However, all my settings
are now under version control and they work for both of my machines.</p>

<p>If you’re wondering “where’s the code?”, <a href="https://github.com/szczys/dotfiles">it’s right
here</a>.</p>]]></content><author><name>Mike Szczys</name></author><category term="Linux" /><category term="Hyprland" /><category term="dotfiles" /><summary type="html"><![CDATA[Hyprland has no built-in support for conditional configuration. This makes me a bit sad as I like to maintain a single dotfile repo that works for more than one computer. Here's how I configure Hyprland based on hostname.]]></summary><media:thumbnail xmlns:media="http://search.yahoo.com/mrss/" url="/wp-content/uploads/2025/05/hyprland-conditional-configuration.png" /><media:content medium="image" url="/wp-content/uploads/2025/05/hyprland-conditional-configuration.png" xmlns:media="http://search.yahoo.com/mrss/" /></entry><entry><title type="html">How to use Twister to cycle test Zephyr devices</title><link href="/blog/2024-02-10-twister-device-testing/" rel="alternate" type="text/html" title="How to use Twister to cycle test Zephyr devices" /><published>2024-02-10T16:10:00-06:00</published><updated>2024-02-10T16:10:00-06:00</updated><id>/blog/twister-device-testing</id><content type="html" xml:base="/blog/2024-02-10-twister-device-testing/"><![CDATA[<p><a href="https://docs.zephyrproject.org/latest/develop/test/twister.html">Twister</a> is
the test runner tool built into Zephyr RTOS. At <a href="https://golioth.io">Golioth</a> we
use it extensively for our
<a href="https://blog.golioth.io/automatically-detecting-boards-for-hardware-in-the-loop-hil-testing/">Hardware-in-the-Loop</a>
testing. I also use it locally for device testing. However, it can be a pain to
set up environment variables and remember the test syntax.</p>

<p>A couple of weeks ago I wrote a small helper script to assist in cycle testing.
It configures everything, calls Twister, and counts the successes.</p>

<div class="language-bash highlighter-rouge"><div class="highlight"><pre class="highlight"><code><span class="c">#!/bin/bash</span>

<span class="nv">SCRIPT_DIR</span><span class="o">=</span><span class="si">$(</span> <span class="nb">cd</span> <span class="nt">--</span> <span class="s2">"</span><span class="si">$(</span> <span class="nb">dirname</span> <span class="nt">--</span> <span class="s2">"</span><span class="k">${</span><span class="nv">BASH_SOURCE</span><span class="p">[0]</span><span class="k">}</span><span class="s2">"</span> <span class="si">)</span><span class="s2">"</span> &amp;&gt; /dev/null <span class="o">&amp;&amp;</span> <span class="nb">pwd</span> <span class="si">)</span>

<span class="c">#export CI_MIMXRT1024_EVK_PORT=/dev/ttyACM0</span>
<span class="c">#export PORT_VAR=/dev/ttyACM0</span>
<span class="c">#export SNR_VAR=728343547</span>
<span class="c">#export GOLIOTH_API_KEY="golioth-project-api-key"</span>
<span class="c">#export GOLIOTH_CREDENTIALS_FILE="${SCRIPT_DIR}/credentials_empty.yml"</span>
<span class="c">#export hil_board=mimxrt1024_evk</span>
<span class="c">#export west_board=mimxrt1024_evk</span>

<span class="nb">export </span><span class="nv">CI_NRF52840DK_NRF52840_PORT</span><span class="o">=</span>/dev/ttyACM0
<span class="nb">export </span><span class="nv">PORT_VAR</span><span class="o">=</span>/dev/ttyACM0
<span class="nb">export </span><span class="nv">SNR_VAR</span><span class="o">=</span>1050266122
<span class="nb">export </span><span class="nv">GOLIOTH_API_KEY</span><span class="o">=</span><span class="s2">"golioth-project-api-key"</span>
<span class="nb">export </span><span class="nv">GOLIOTH_CREDENTIALS_FILE</span><span class="o">=</span><span class="s2">"</span><span class="k">${</span><span class="nv">SCRIPT_DIR</span><span class="k">}</span><span class="s2">/credentials.yml"</span>
<span class="nb">export </span><span class="nv">hil_board</span><span class="o">=</span>nrf52840dk
<span class="nb">export </span><span class="nv">west_board</span><span class="o">=</span>nrf52840dk_nrf52840

<span class="nv">i</span><span class="o">=</span>0

zephyr/scripts/twister <span class="se">\</span>
    <span class="nt">--platform</span> <span class="k">${</span><span class="nv">west_board</span><span class="k">}</span> <span class="se">\</span>
    <span class="nt">-T</span> modules/lib/golioth-firmware-sdk/examples/zephyr/fw_update <span class="se">\</span>
    <span class="nt">--prep-artifacts-for-testing</span>

<span class="nv">ret</span><span class="o">=</span><span class="nv">$?</span>

<span class="nb">echo</span> <span class="nt">-e</span> <span class="s2">"</span><span class="se">\n</span><span class="s2">############ Build set complete; beginning tests ##############</span><span class="se">\n</span><span class="s2">"</span>

<span class="k">until</span> <span class="o">[</span> <span class="s2">"</span><span class="nv">$ret</span><span class="s2">"</span> <span class="nt">-ne</span> 0 <span class="o">]</span>
<span class="k">do
    </span>zephyr/scripts/twister <span class="se">\</span>
        <span class="nt">--platform</span> <span class="k">${</span><span class="nv">west_board</span><span class="k">}</span> <span class="se">\</span>
        <span class="nt">-T</span> modules/lib/golioth-firmware-sdk/examples/zephyr/fw_update <span class="se">\</span>
        <span class="nt">--device-testing</span> <span class="se">\</span>
        <span class="nt">--device-serial</span> <span class="k">${</span><span class="nv">PORT_VAR</span><span class="k">}</span> <span class="nt">--test-only</span> <span class="se">\</span>
        <span class="nt">--west-flash</span><span class="o">=</span><span class="s2">"--skip-rebuild,--dev-id=</span><span class="k">${</span><span class="nv">SNR_VAR</span><span class="k">}</span><span class="s2">"</span> <span class="se">\</span>
        <span class="nt">-v</span>

    <span class="nv">ret</span><span class="o">=</span><span class="nv">$?</span>
    <span class="o">((</span><span class="nv">i</span><span class="o">=</span>i+1<span class="o">))</span>

    <span class="nb">echo</span> <span class="nt">-e</span> <span class="s2">"</span><span class="se">\n</span><span class="s2">############ Iteration: </span><span class="nv">$i</span><span class="s2"> ########## Return Code: </span><span class="nv">$ret</span><span class="s2"> ##############</span><span class="se">\n</span><span class="s2">"</span>
<span class="k">done

</span>play bell.mp3
</code></pre></div></div>

<h2 id="code-walkthrough">Code Walkthrough</h2>

<p>This was initially used to cycle test OTA updates using <a href="https://github.com/golioth/golioth-firmware-sdk/tree/main/examples/zephyr/fw_update">the <code class="language-plaintext highlighter-rouge">fw_update</code>
sample</a>
in the Golioth Firmware SDK.</p>

<div class="language-bash highlighter-rouge"><div class="highlight"><pre class="highlight"><code><span class="nb">export </span><span class="nv">CI_NRF52840DK_NRF52840_PORT</span><span class="o">=</span>/dev/ttyACM0
<span class="nb">export </span><span class="nv">PORT_VAR</span><span class="o">=</span>/dev/ttyACM0
<span class="nb">export </span><span class="nv">SNR_VAR</span><span class="o">=</span>1050266122
<span class="nb">export </span><span class="nv">GOLIOTH_API_KEY</span><span class="o">=</span><span class="s2">"golioth-project-api-key"</span>
<span class="nb">export </span><span class="nv">GOLIOTH_CREDENTIALS_FILE</span><span class="o">=</span><span class="s2">"</span><span class="k">${</span><span class="nv">SCRIPT_DIR</span><span class="k">}</span><span class="s2">/credentials.yml"</span>
<span class="nb">export </span><span class="nv">hil_board</span><span class="o">=</span>nrf52840dk
<span class="nb">export </span><span class="nv">west_board</span><span class="o">=</span>nrf52840dk_nrf52840
</code></pre></div></div>

<p>Our pytest file for that sample looks for a number of key values to be present as
environment variables so I added two blocks to this file to set that all up,
commenting or uncommenting for the device under test.</p>

<div class="language-bash highlighter-rouge"><div class="highlight"><pre class="highlight"><code>zephyr/scripts/twister <span class="se">\</span>
    <span class="nt">--platform</span> <span class="k">${</span><span class="nv">west_board</span><span class="k">}</span> <span class="se">\</span>
    <span class="nt">-T</span> modules/lib/golioth-firmware-sdk/examples/zephyr/fw_update <span class="se">\</span>
    <span class="nt">--prep-artifacts-for-testing</span>
</code></pre></div></div>

<p>I run this from the root of the Zephyr install. The first Twister command builds
the firmware. The <code class="language-plaintext highlighter-rouge">--prep-artifacts-for-testing</code> flag saves only the binaries
and other files necessary to flash a device into a <code class="language-plaintext highlighter-rouge">twister-out</code> directory. I’ll
explain the other flags later in this post.</p>

<div class="language-bash highlighter-rouge"><div class="highlight"><pre class="highlight"><code><span class="nv">ret</span><span class="o">=</span><span class="nv">$?</span>

<span class="nb">echo</span> <span class="nt">-e</span> <span class="s2">"</span><span class="se">\n</span><span class="s2">############ Build set complete; beginning tests ##############</span><span class="se">\n</span><span class="s2">"</span>

<span class="k">until</span> <span class="o">[</span> <span class="s2">"</span><span class="nv">$ret</span><span class="s2">"</span> <span class="nt">-ne</span> 0 <span class="o">]</span>
<span class="k">do</span>
    <span class="c">#Run the twister device test here</span>

    <span class="nv">ret</span><span class="o">=</span><span class="nv">$?</span>
    <span class="o">((</span><span class="nv">i</span><span class="o">=</span>i+1<span class="o">))</span>

    <span class="nb">echo</span> <span class="nt">-e</span> <span class="s2">"</span><span class="se">\n</span><span class="s2">############ Iteration: </span><span class="nv">$i</span><span class="s2"> ########## Return Code: </span><span class="nv">$ret</span><span class="s2"> ##############</span><span class="se">\n</span><span class="s2">"</span>
<span class="k">done

</span>play bell.mp3
</code></pre></div></div>

<p>Because I’m looking to cycle test this code (run many tests one after the other to
ensure there are no failures), I set up a loop in the bash script. Immediately
after each Twister command, <code class="language-plaintext highlighter-rouge">ret=$?</code> is called to store the Twister return code. If
successful, a <code class="language-plaintext highlighter-rouge">0</code> is returned and the loop continues. If an error code is
returned the loop breaks and a bell sound plays (using the Linux <code class="language-plaintext highlighter-rouge">sox</code> package).</p>

<div class="language-bash highlighter-rouge"><div class="highlight"><pre class="highlight"><code>zephyr/scripts/twister <span class="se">\</span>
    <span class="nt">--platform</span> <span class="k">${</span><span class="nv">west_board</span><span class="k">}</span> <span class="se">\</span>
    <span class="nt">-T</span> modules/lib/golioth-firmware-sdk/examples/zephyr/fw_update <span class="se">\</span>
    <span class="nt">--device-testing</span> <span class="se">\</span>
    <span class="nt">--device-serial</span> <span class="k">${</span><span class="nv">PORT_VAR</span><span class="k">}</span> <span class="se">\</span>
    <span class="nt">--test-only</span> <span class="se">\</span>
    <span class="nt">--west-flash</span><span class="o">=</span><span class="s2">"--skip-rebuild,--dev-id=</span><span class="k">${</span><span class="nv">SNR_VAR</span><span class="k">}</span><span class="s2">"</span> <span class="se">\</span>
    <span class="nt">-v</span>
</code></pre></div></div>

<p>The second Twister command uses the binaries from the first to test the code on
actual hardware. Here is what each flag is used for:</p>

<ul>
  <li><code class="language-plaintext highlighter-rouge">--platform</code>: supplies the Zephyr board name</li>
  <li><code class="language-plaintext highlighter-rouge">-T</code>: path of the Zephyr directory of your desired <code class="language-plaintext highlighter-rouge">sample.yml</code> file that
details each test. Here I’m targeting a specific folder that has two tests. If
you leave this blank, Twister will crawl the tree looking for all sample files
and running the tests described within.</li>
  <li><code class="language-plaintext highlighter-rouge">--device-testing</code>: tells Twister to run on actual hardware</li>
  <li><code class="language-plaintext highlighter-rouge">--device-serial</code>: serial address of the actual hardware</li>
  <li><code class="language-plaintext highlighter-rouge">--test-only</code>: don’t rebuild the firmware, use binaries from previous Twister
build</li>
  <li><code class="language-plaintext highlighter-rouge">--west-flash</code>: use the west flash command for programming and optionally pass
some west flags. Here I’m telling <code class="language-plaintext highlighter-rouge">west</code> not to rebuild the project, and
passing the serial number of the J-Link device as I usually have multiple J-Link
devices connected at the same time.</li>
  <li><code class="language-plaintext highlighter-rouge">-v</code>: verbose mode; I like to use this so I can <code class="language-plaintext highlighter-rouge">tail -f</code> the
<code class="language-plaintext highlighter-rouge">twister_harness.log</code> to see which tests pass/fail in real time.</li>
</ul>

<h2 id="wrapup">Wrapup</h2>

<p>Twister is a sledge-hammer of a test suite, but with a helper script like this
you can use it as if it were precision tweezers.</p>

<p>Recently, I needed to increase the network buffers available to an application.
This is kind of guesswork as you need enough buffers that you don’t run out but
allocating extra buffers wastes RAM. Since I already had this script on hand, I
started with a high number of RAM buffers and modified the script to reduce the
number by one each cycle (The firmware was also compiled on each step by
removing the <code class="language-plaintext highlighter-rouge">--test-only</code> flag). Once the test failed I knew exactly where the
buffer threshold was located.</p>

<p>I hope this helps. I’ll certainly be using this a lot and will post more as I
develop addition improvements.</p>]]></content><author><name>Mike Szczys</name></author><category term="Zephyr" /><category term="testing" /><category term="twister" /><summary type="html"><![CDATA[Zephyr includes a test runner app called Twister. It has a dizzying number of features, and recently I wrote a script to configure the tool for my most-used operation: cycle testing on embedded devices.]]></summary><media:thumbnail xmlns:media="http://search.yahoo.com/mrss/" url="/wp-content/uploads/2024/02/nrf52840dk-with-esp32-as-AT-modem.jpg" /><media:content medium="image" url="/wp-content/uploads/2024/02/nrf52840dk-with-esp32-as-AT-modem.jpg" xmlns:media="http://search.yahoo.com/mrss/" /></entry><entry><title type="html">Moving from CoC to Neovim LSP</title><link href="/blog/2023-11-15-from-vim-CoC-to-vnim-LSP/" rel="alternate" type="text/html" title="Moving from CoC to Neovim LSP" /><published>2023-11-15T06:45:00-06:00</published><updated>2023-11-15T06:45:00-06:00</updated><id>/blog/from-vim-CoC-to-vnim-LSP</id><content type="html" xml:base="/blog/2023-11-15-from-vim-CoC-to-vnim-LSP/"><![CDATA[<p>Language Server Protocol (LSP) was developed to standardize the creation of
plugins that handle language-specific tasks like parsing, hinting, doucmentation
linking, and snippets for Visual Studio Code (VScode). Somewhere along the way,
Microsoft opened the standard and it has since been implemented in Neovim. That
means the same language servers used in VScode can be used with nvim!</p>

<p>This has been around for awhile, but I just recently took the plunge, building
my nvim setup from the ground-up to take advantage of this and other features.
Today, I’m going to cover some of the features I like and use, saving the actual
installation and setup for another post. If you’d like to play along, my nvim
setup is <a href="https://github.com/szczys/dotfiles/">available in my dotfiles repo</a>.</p>

<div class="youtube-wrapper">
   <video controls="controls" autoplay="" loop="">
     <source src="/wp-content/uploads/2023/11/nvim-lsp-demo.mp4" type="video/mp4" />
   </video>
</div>]]></content><author><name>Mike Szczys</name></author><category term="Linux" /><category term="Vim" /><summary type="html"><![CDATA[A few weeks ago I made the switch from using Conquery of Code (CoC) to using Neovim's native Language Server Protocol (LSP). This modernized my vim setup and delivered the kind of hinting, linting, and completion necessary to code efficiently.]]></summary><media:thumbnail xmlns:media="http://search.yahoo.com/mrss/" url="/wp-content/uploads/2023/11/from-CoC-to-LSP.png" /><media:content medium="image" url="/wp-content/uploads/2023/11/from-CoC-to-LSP.png" xmlns:media="http://search.yahoo.com/mrss/" /></entry><entry><title type="html">Dotfiles Exposed</title><link href="/blog/2023-11-14-dotfiles-exposed/" rel="alternate" type="text/html" title="Dotfiles Exposed" /><published>2023-11-14T16:45:00-06:00</published><updated>2023-11-14T16:45:00-06:00</updated><id>/blog/dotfiles-exposed</id><content type="html" xml:base="/blog/2023-11-14-dotfiles-exposed/"><![CDATA[<p>The dotfiles I use to configure my Linux system are now <a href="https://github.com/szczys/dotfiles/tree/main">publicly available in
a Git repository</a>.</p>

<p>For years I’ve tracked my configuration files, sharing them across systems in a
private GitHub repository. But I’ve learned a lot of tricks reading the dotfiles
of others (especially while setting up nvim) so I’ve decided to pay that forward
by sharing mine. Interestingly, when making a new repo I looked around for how
others are doing it and found a much better way than my old approach of making
symlinks from the home folder to the local repository.</p>

<h2 id="using---git-dir---work-tree-and-a-git-alias">Using <code class="language-plaintext highlighter-rouge">--git-dir</code>, <code class="language-plaintext highlighter-rouge">--work-tree</code>, and a Git alias</h2>

<p>I came across <a href="https://pgaskin.net/posts/git-dotfiles/"><em>How to manage your dotfiles in
Git</em></a> by Paul Gasking. It lays out an
interesting set of Git options, most notably creating an alias used to call your
dotfile repository git actions from anywhere on the system. The approach is
novel, allowing any file in your Home directory to be individually added to the
repo.</p>

<p>I didn’t fully understand why this works so I found Gabrielle Young’s article
<a href="https://www.ackama.com/what-we-think/the-best-way-to-store-your-dotfiles-a-bare-git-repository-explained/"><em>The best way to store your dotfiles: A bare Git repository
**EXPLAINED**</em></a>
that clears everything up. By default, a repository always has a <code class="language-plaintext highlighter-rouge">.git</code> folder at
root, but that’s not a hard and fast requirement.</p>

<ul>
  <li>Use the <code class="language-plaintext highlighter-rouge">--git-dir</code> directive to specify a different <code class="language-plaintext highlighter-rouge">.git</code> location</li>
  <li>Set the root of the repo somewhere else using <code class="language-plaintext highlighter-rouge">--work-tree</code></li>
</ul>

<h2 id="silencing-untracked-files-and-automating-the-custom-git-calls">Silencing untracked files and automating the custom <code class="language-plaintext highlighter-rouge">git</code> calls</h2>

<p>With my Home directory as the work tree, and a subdirectory for the <code class="language-plaintext highlighter-rouge">.git</code>
folder, Git will normally see every file in Home as untracked. Setting
<code class="language-plaintext highlighter-rouge">status.showUntrackedFiles</code> to <code class="language-plaintext highlighter-rouge">no</code> in the Git config is necessary to silence
the madness. Now, only files explicitly added to the repo will be tracked for
changes.</p>

<p>Finally, a clever use of <code class="language-plaintext highlighter-rouge">alias</code> lets me call Git with all of the necessary
flags:</p>

<div class="language-bash highlighter-rouge"><div class="highlight"><pre class="highlight"><code><span class="nb">alias </span><span class="nv">config</span><span class="o">=</span><span class="s1">'/usr/bin/git --git-dir=$HOME/.cfg/.git/ --work-tree=$HOME'</span>
</code></pre></div></div>

<p>When I make a change to a dotfile, I use the <code class="language-plaintext highlighter-rouge">config</code> command as if I were
typing <code class="language-plaintext highlighter-rouge">git</code>:</p>

<div class="language-shell highlighter-rouge"><div class="highlight"><pre class="highlight"><code><span class="nv">$ </span>config add ~/.profile
<span class="nv">$ </span>config status
<span class="nv">$ </span>config diff <span class="nt">--cached</span>
<span class="nv">$ </span>config commit <span class="nt">-s</span>
<span class="nv">$ </span>config push
</code></pre></div></div>

<p>Pretty slick, right?</p>

<h2 id="wrapping-up">Wrapping up</h2>

<p>This is not a tutorial, so <a href="https://www.ackama.com/what-we-think/the-best-way-to-store-your-dotfiles-a-bare-git-repository-explained/">head over to Gabrielle’s
guide</a>
if you want to get set up the same way. For now I have my Bash and Neovim
dotfiles posted, but will be adding more as I clean up my system config.</p>]]></content><author><name>Mike Szczys</name></author><category term="Linux" /><summary type="html"><![CDATA[My Linux configuration files&ndash;colloquially known as dotfiles&ndash;are now publicily available. This post shares some interesting Git commands I learned when creating the repo.]]></summary><media:thumbnail xmlns:media="http://search.yahoo.com/mrss/" url="/wp-content/uploads/2023/11/dotfiles-exposed.png" /><media:content medium="image" url="/wp-content/uploads/2023/11/dotfiles-exposed.png" xmlns:media="http://search.yahoo.com/mrss/" /></entry><entry><title type="html">Using TTGO T-Display with Zephyr</title><link href="/blog/2023-03-30-using-ttgo-t-display-with-zephyr/" rel="alternate" type="text/html" title="Using TTGO T-Display with Zephyr" /><published>2023-03-30T19:29:00-05:00</published><updated>2023-03-30T19:29:00-05:00</updated><id>/blog/using-ttgo-t-display-with-zephyr</id><content type="html" xml:base="/blog/2023-03-30-using-ttgo-t-display-with-zephyr/"><![CDATA[<p>When I was first starting out with Zephyr last year I tried to get <a href="http://www.lilygo.cn/prod_view.aspx?TypeId=50062&amp;Id=1400&amp;FId=t3:50062:3">Lilygo’s
TTGO
T-Display</a>
working with little success. Now, with twelve more months of Zephyr experience
under my belt I picked it up again and got it working quite easily. Let’s take a
look at the process.</p>

<h2 id="overview">Overview</h2>

<div class="youtube-wrapper">
   <video controls="controls">
     <source src="/wp-content/uploads/2023/03/TTGO-T-DISPLAY_Zephyr_LVGL.mp4" type="video/mp4" />
   </video>
</div>

<p>The display uses an ST7789 controller, and Zephyr has a driver that works with
just a few configuration tweaks. In tailoring for this particular screen I found
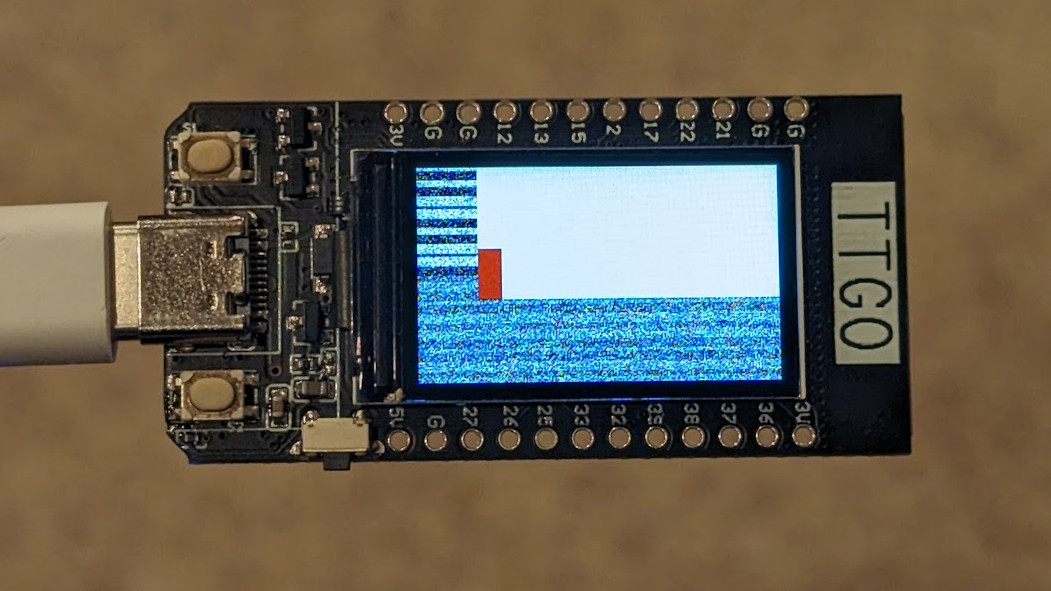
a few tripping points that need to be addressed to get everything working:</p>

<ol>
  <li>The backlight must be driven. I had the display working but didn’t realize it
because you can’t see pixels without turning on the backlight. (This is so
obvious after the fact!)</li>
  <li>An overlay file must define both the ST7789 node, and assign that node as the
chosen display.</li>
  <li>Memory offsets need to be configured to position the image correctly on the
display. When the offsets are wrong, you will see uninitialized memory
(noise) on the edges of an otherwise correct image.</li>
  <li>The ordering of the colors for this display is BGR (not RGB).</li>
</ol>

<p>Code for the application shown in the video is <a href="https://github.com/szczys/zephyr-lvgl-ttgo-display">available on
GitHub</a>.</p>

<h2 id="creating-the-devicetree-overlay-file">Creating the Devicetree overlay file</h2>

<p>A good starting point is to look at the <a href="https://docs.zephyrproject.org/latest/build/dts/api/bindings/display/sitronix%2Cst7789v.html#dtbinding-sitronix-st7789v">Zephyr Bindings Index entry for this
display</a>.
There are an awful lot of parameters to set, but we’re lucky that a couple of
shields already exist that use this driver. I’ve copied the
<a href="https://github.com/zephyrproject-rtos/zephyr/blob/21d1ad3762302b3e461953df59430c77e0709274/boards/shields/st7789v_generic/st7789v_waveshare_240x240.overlay">st7789v_waveshare_240x240</a>
overlay. Here is the full overlay file I created based on that example.</p>

<div class="language-plaintext highlighter-rouge"><div class="highlight"><pre class="highlight"><code>/ {
	aliases {
		led0 = &amp;led0;
	};

	chosen {
		zephyr,display = &amp;st7789v;
	};

	leds {
		compatible = "gpio-leds";
		led0: led_0 {
			gpios = &lt;&amp;gpio0 4 GPIO_ACTIVE_HIGH&gt;;
			label = "Green LED 0";
		};
	};
};

&amp;spi3 {
	st7789v: st7789v@0 {
		compatible = "sitronix,st7789v";
		spi-max-frequency = &lt;20000000&gt;;
		reg = &lt;0&gt;;
		cmd-data-gpios = &lt;&amp;gpio0 16 GPIO_ACTIVE_LOW&gt;;
		reset-gpios = &lt;&amp;gpio0 23 GPIO_ACTIVE_LOW&gt;;
		vcom = &lt;0x28&gt;;
		gctrl = &lt;0x35&gt;;
		vrhs = &lt;0x10&gt;;
		vdvs = &lt;0x20&gt;;

		/* Landscape */
		width = &lt;240&gt;;
		height = &lt;135&gt;;
		x-offset = &lt;40&gt;;
		y-offset = &lt;52&gt;;
		mdac = &lt;0xA8&gt;;

		gamma = &lt;0x01&gt;;
		colmod = &lt;0x55&gt;;
		lcm = &lt;0x0C&gt;;
		porch-param = [0C 0C 00 33 33];
		cmd2en-param = [5A 69 02 01];
		pwctrl1-param = [A4 A1];
		pvgam-param = [D0 00 02 07 0A 28 32 44 42 06 0E 12 14 17];
		nvgam-param = [D0 00 02 07 0A 28 31 54 47 0E 1C 17 1B 1E];
		ram-param = [00 E0];
		rgb-param = [CD 08 14];
	};
};

&amp;pinctrl {
	spim3_default: spim3_default {
		group1 {
			pinmux = &lt;SPIM3_SCLK_GPIO18&gt;,
				 &lt;SPIM3_CSEL_GPIO5&gt;;
		};
		group2 {
			pinmux = &lt;SPIM3_MOSI_GPIO19&gt;;
			output-low;
		};
	};
};
</code></pre></div></div>

<p>Many of the values have been changed from the example. For the bulk of the
screen initialization settings, I copied over what is used <a href="https://github.com/Xinyuan-LilyGO/TTGO-T-Display/blob/master/TFT_eSPI/TFT_Drivers/ST7789_Init.h">in the TTGO
library</a>.
There are a couple of commands missing in the Zephyr implementation (e.g.
<code class="language-plaintext highlighter-rouge">ST7789_CASET</code>, <code class="language-plaintext highlighter-rouge">ST7789_RASET</code>) but they are set to the defaults anyway. The
only suspicious command I found is <code class="language-plaintext highlighter-rouge">0xB6</code> which is a register that doesn’t
appear at all in the ST7789 datasheet but there is <a href="https://github.com/Xinyuan-LilyGO/TTGO-T-Display/blob/0ea22274252cc80bc6b572ccc201637f983c65aa/TFT_eSPI/TFT_Drivers/ST7789_Init.h#L19-L22">a 0xB6 command called in the
driver</a>.</p>

<h3 id="display-orientation-and-color-ordering">Display orientation and Color Ordering</h3>

<p>By default the display is set up for portrait orientation using these
parameters:</p>

<div class="language-plaintext highlighter-rouge"><div class="highlight"><pre class="highlight"><code>		/* Portrait */
		width = &lt;125&gt;;
		height = &lt;240&gt;;
		x-offset = &lt;52&gt;;
		y-offset = &lt;40&gt;;
		mdac = &lt;0x08&gt;;
</code></pre></div></div>

<p>I worked out the x and y offset values for this screen using trial and error. To
change orientation, the width/height and offset values are simply swapped. All
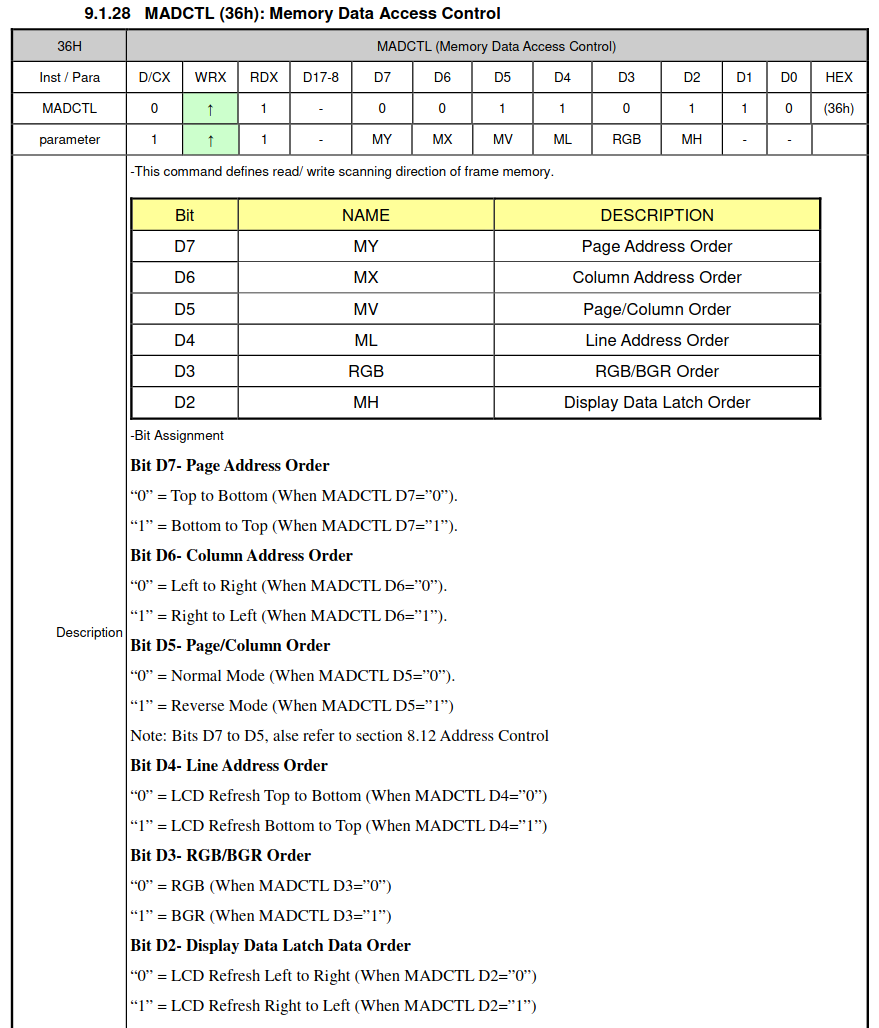
the real orientation magic happens in the Memory Data Access Control (MADCTL)
register, represented in the overlay by <code class="language-plaintext highlighter-rouge">mdac</code>.</p>

<p><img src="/wp-content/uploads/2023/03/TTGO-T-DISPLAY_bad-offset.jpg" alt="TTGO T-Display with bad offset and color
order" />
<em class="caption">The offset values are needed to display the white rectangle within the confines
of the screen edges. In this image you can also see a red rectangle in one
corner. This should be blue but is displayed incorrectly because of the
configured color order.</em></p>

<p>For this display, a <code class="language-plaintext highlighter-rouge">0x08</code> value is necessary to change the color order from RGB
to BGR. The <code class="language-plaintext highlighter-rouge">0xA</code> or <code class="language-plaintext highlighter-rouge">0x0</code> values select between 90-degree rotation and 0-degree
rotation via memory manipulation. So the <code class="language-plaintext highlighter-rouge">mdac</code> for portrait is <code class="language-plaintext highlighter-rouge">0xA8</code> and for
landscape it’s <code class="language-plaintext highlighter-rouge">0x08</code>.</p>

<p><img src="/wp-content/uploads/2023/03/ST7789_MADCTL_register-description.png" alt="MADCTL register
description" /></p>

<h3 id="pin-control-and-backlight-operation">Pin Control and Backlight Operation</h3>

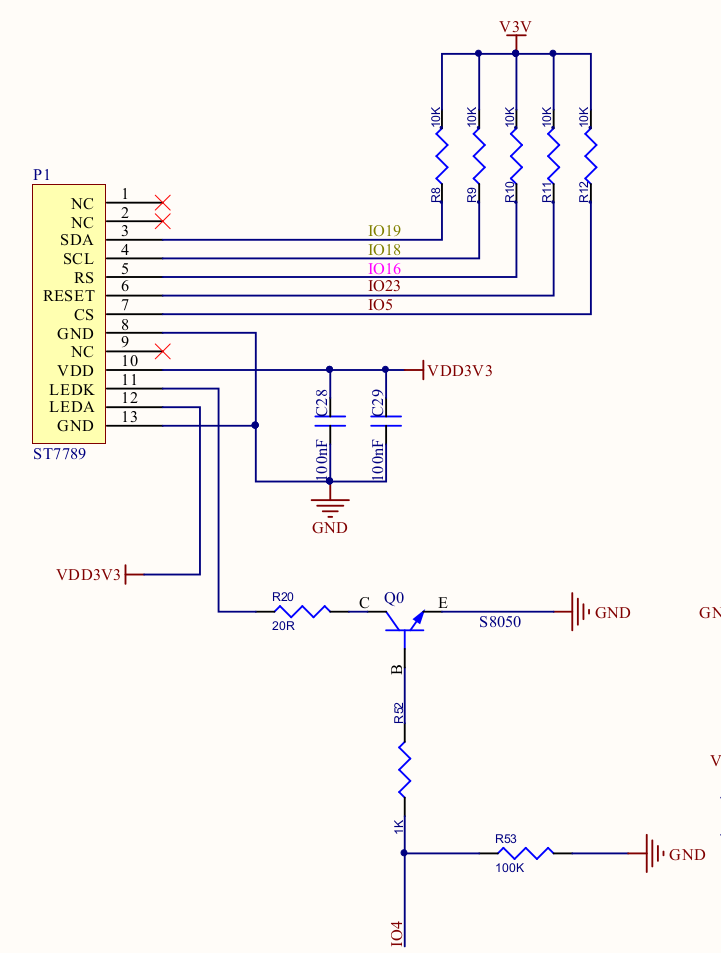
<p>The overlay file needs to configure the pins for the screen and backlight.</p>

<p><img src="/wp-content/uploads/2023/03/TTGO-T-DISPLAY_st7789-schematic.png" alt="TTGO T-Display st7789
schematic" /></p>

<p>The ST7789 communicates over SPI so I have selected the ESP32’s SPI3 peripheral
and used pinctrl to remap the pins. Other than the <code class="language-plaintext highlighter-rouge">RS</code> connection, which maps
to the <code class="language-plaintext highlighter-rouge">cmd-data-gpios</code>, the labels are pretty straight-forward.</p>

<div class="language-plaintext highlighter-rouge"><div class="highlight"><pre class="highlight"><code>&amp;pinctrl {
	spim3_default: spim3_default {
		group1 {
			pinmux = &lt;SPIM3_SCLK_GPIO18&gt;,
				 &lt;SPIM3_CSEL_GPIO5&gt;;
		};
		group2 {
			pinmux = &lt;SPIM3_MOSI_GPIO19&gt;;
			output-low;
		};
	};
};
</code></pre></div></div>

<p>I used the <code class="language-plaintext highlighter-rouge">led0</code> alias because Zephyr’s display sample turns that standard LED
on at run time. This is a convenient way to turn the backlight on, but should
probably be mapped differently in your own project.</p>

<div class="language-plaintext highlighter-rouge"><div class="highlight"><pre class="highlight"><code>/ {
	aliases {
		led0 = &amp;led0;
	};

	leds {
		compatible = "gpio-leds";
		led0: led_0 {
			gpios = &lt;&amp;gpio0 4 GPIO_ACTIVE_HIGH&gt;;
			label = "Green LED 0";
		};
	};
};
</code></pre></div></div>

<h3 id="choosing-the-display">Choosing the display</h3>

<p>The best thing about Zephyr is its abstraction layers. With the ST7789 drive
configured, all that’s needed to tie it into the RTOS is to associate the node
as the chosen display. Here’s the bit from above that accomplishes that:</p>

<div class="language-plaintext highlighter-rouge"><div class="highlight"><pre class="highlight"><code>/ {
	chosen {
		zephyr,display = &amp;st7789v;
	};
};
</code></pre></div></div>

<h3 id="building-the-zephyr-display-sample">Building the Zephyr Display Sample</h3>

<p><img src="/wp-content/uploads/2023/03/TTGO-T-DISPLAY_zephyr-display-sample.jpg" alt="Running the Zephyr Display sample on the TTGO
TTGO-T-DISPLAY" />
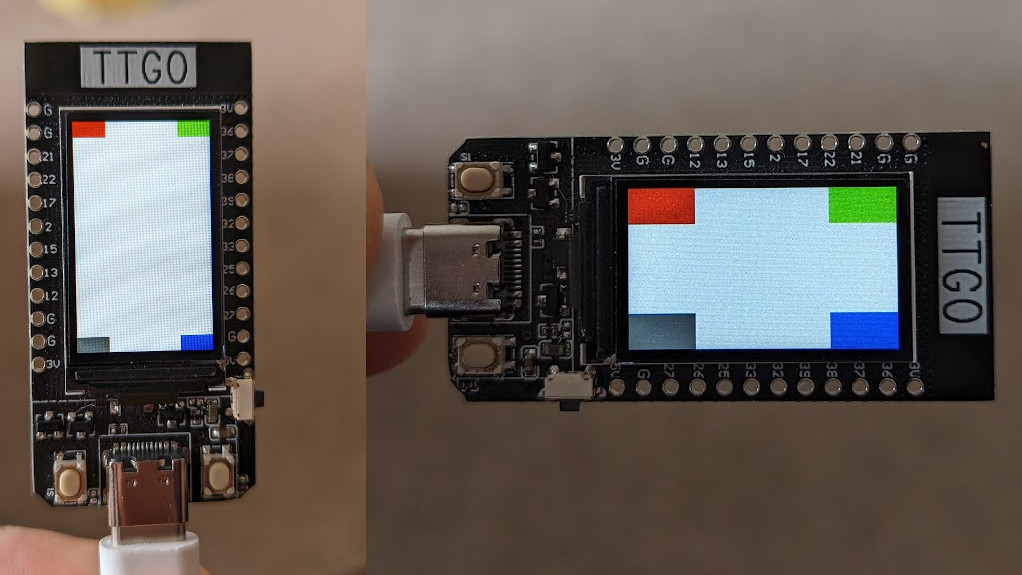
<em class="caption">The Zephyr display sample shown in both portrait and landscape. If configured
correctly, the rectangles will be red, green, blue, and fading gray (clockwise
starting in the upper left).</em></p>

<p>Now that we have an overlay file, the Zephyr Display Sample can be built for
this board.</p>

<div class="language-shell highlighter-rouge"><div class="highlight"><pre class="highlight"><code><span class="nv">$ </span><span class="nb">cd </span>zephyr/samples/drivers/display
<span class="nv">$ </span>west build <span class="nt">-b</span> esp32 <span class="nb">.</span>
<span class="nv">$ </span>west flash
</code></pre></div></div>

<h2 id="bonus-using-lvgl">Bonus: Using LVGL</h2>

<p>I was able to get get LVGL running on this display without much hassle, as shown
in the video at the top of this post. The only thing I discovered is that color
ordering is also an issue with the LVGL configuration. There is a Kconfig symbol
that will swap the red and blue values to match what the display is expecting:</p>

<div class="language-plaintext highlighter-rouge"><div class="highlight"><pre class="highlight"><code>CONFIG_LV_COLOR_16_SWAP=y
</code></pre></div></div>

<p>Alas, I’ll have to leave the LVGL tutorial for another day ;-)</p>]]></content><author><name>Mike Szczys</name></author><category term="Zephyr" /><category term="Tutorials" /><category term="ESP32" /><summary type="html"><![CDATA[The TTGO T-Display is an ESP32 development board from Lilygo with an integrated screen that looks fantastic. While this has great support with Arduino and (I assume) ESP-IDF, it took a bit of playing around with a Devicetree overlay file to get the screen working in Zephyr.]]></summary><media:thumbnail xmlns:media="http://search.yahoo.com/mrss/" url="/wp-content/uploads/2023/03/TTGO-T-DISPLAY_title_slide.jpg" /><media:content medium="image" url="/wp-content/uploads/2023/03/TTGO-T-DISPLAY_title_slide.jpg" xmlns:media="http://search.yahoo.com/mrss/" /></entry><entry><title type="html">How to install Linux on the eMMC of an Orange Pi 3 LTS</title><link href="/blog/2023-02-13-install-linux-orange-pi-3-lts-emmc/" rel="alternate" type="text/html" title="How to install Linux on the eMMC of an Orange Pi 3 LTS" /><published>2023-02-13T19:23:00-06:00</published><updated>2023-02-13T19:23:00-06:00</updated><id>/blog/install-linux-orange-pi-3-lts-emmc</id><content type="html" xml:base="/blog/2023-02-13-install-linux-orange-pi-3-lts-emmc/"><![CDATA[<p>At Golioth, <a href="https://blog.golioth.io/golioth-hil-testing-part1/">we use Hardware in the Loop
(HIL)</a> testing to validate
all pull requests to the platform on the actual hardware being targeted. This
means that GitHub actions are compiling and running code on the nRF9160, ESP32,
and a few other platforms. It’s really slick!</p>

<p>Part of making this all work is a Linux box that connects GitHub actions to the
actual dev boards. It’s a perfect job for a Raspberry Pi. The catch, of course,
is that because of the chip shortage we haven’t been able to buy a Raspberry Pi
for the last year and a half.</p>

<p>This weekend I spent some time validating <a href="http://www.orangepi.org/html/hardWare/computerAndMicrocontrollers/details/orange-pi-3-LTS.html">the Orange Pi 3
LTS</a>
as a suitable alternative, and I’m quite happy with it. One of the only
drawbacks I have found is that the documentation is not nearly as complete. It
took me a while to find the correct command for copying Linux to the onboard
eMMC flash memory:</p>

<div class="language-shell highlighter-rouge"><div class="highlight"><pre class="highlight"><code><span class="nv">$ </span>nand-sata-install
</code></pre></div></div>

<p>This is command is nowhere to be found on the official wiki, and the
documentation available for download includes a deprecated command that no
longer works. There is also a bit more that goes into the install so I’m going
to walk through the process in this tutorial.</p>

<h2 id="download-ubuntu-and-flash-onto-an-sd-card-for-installation">Download Ubuntu and Flash onto an SD Card for installation</h2>

<p>The first step is to download an Ubuntu image and flash it onto an SD Card. We
will boot the Orange Pi 3 LTS from this SD Card and then install the OS onto the
eMMC storage.</p>

<ol>
  <li>
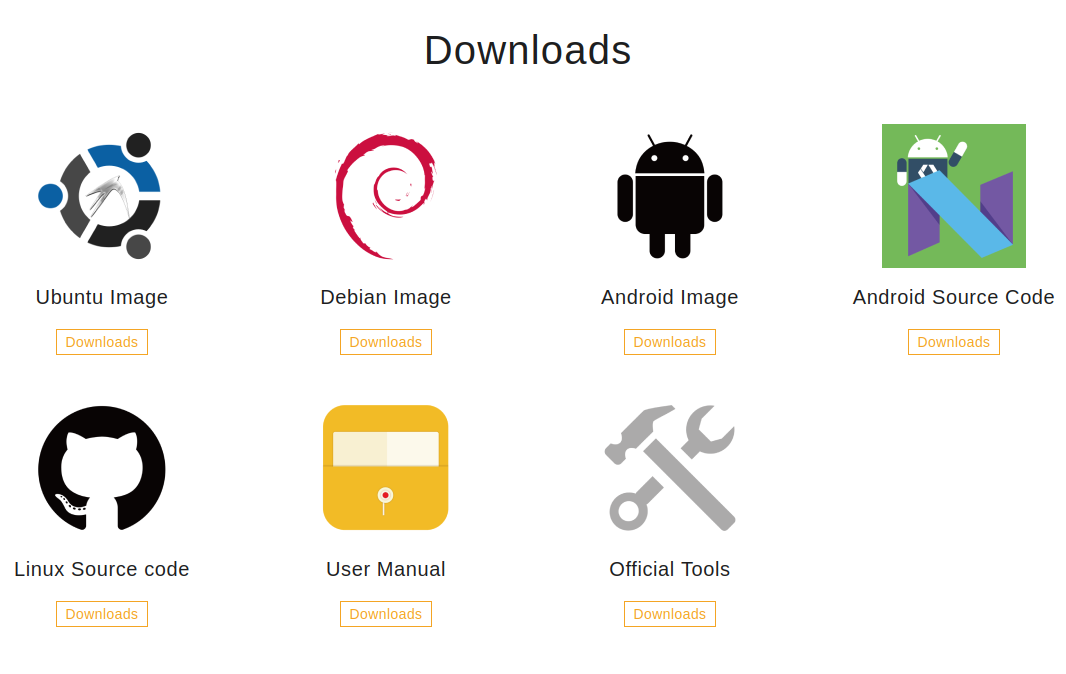
    <p>Go to <a href="http://www.orangepi.org/html/hardWare/computerAndMicrocontrollers/service-and-support/Orange-pi-3-LTS.html">the Orange Pi
downloads</a>
page and choose Ubuntu.</p>

    <p><img src="/wp-content/uploads/2023/02/orangepi-image-download.png" alt="Download Orange Pi Ubuntu image" /></p>

    <p>You will be redirected to a Google Drive folder with several files in it. I
downloaded the <code class="language-plaintext highlighter-rouge">Orangepi3-lts_3.0.8_ubuntu_jammy_server_linux5.16.17.7z</code>
archive as I don’t need a desktop for this project. However, installation for
any of these images is largely the same.</p>
  </li>
  <li>Extract the <code class="language-plaintext highlighter-rouge">.img</code> file from the archive you just downloaded</li>
  <li>
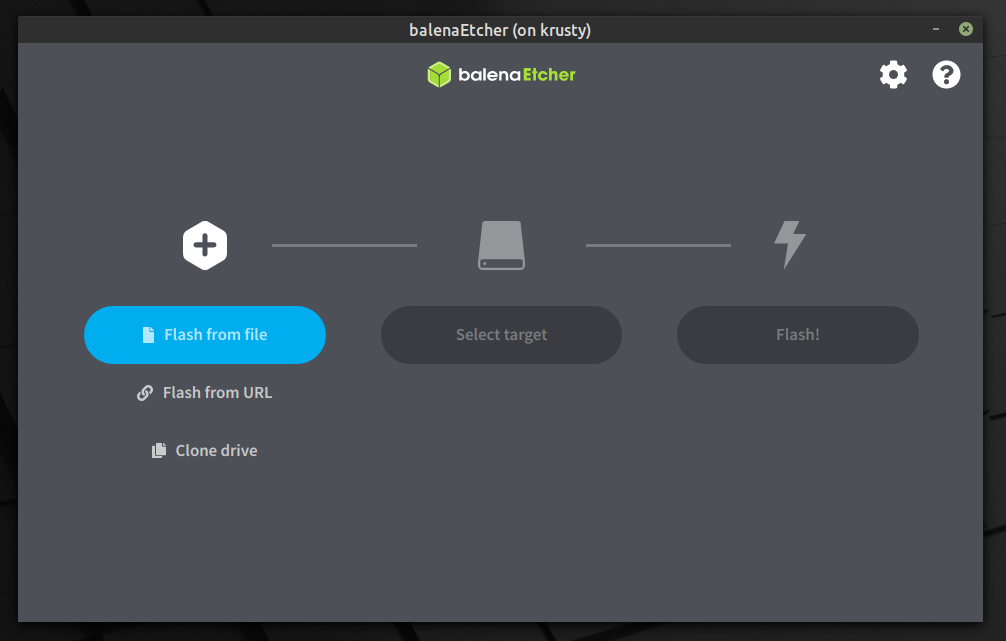
    <p>Download <a href="aria-label=&quot;Compressed Archive:
Orangepi3-lts_3.0.8_ubuntu_jammy_server_linux5.16.17.7z&quot;
data-tooltip-align=&quot;b,c&quot; data-tooltip-delay=&quot;500&quot;
data-tooltip-unhoverable=&quot;true&quot;&gt;Orangepi3-lts_3.0.8_ubuntu_jammy_server_linux5.16.17.7z&lt;/div&gt;&lt;/div&gt;`">Balena Etcher</a>,
which is useful for flashing installation images to an SD Card</p>

    <p><img src="/wp-content/uploads/2023/02/orangepi-balena-etcher.png" alt="Balena Etcher" /></p>
  </li>
  <li>Select your <code class="language-plaintext highlighter-rouge">.img</code> file, chose your SD card, and click on flash.</li>
</ol>

<p>I have seen mention that this SD card should be smaller than the 8GB eMMC on
which we will be installing the OS. However, I haven’t verified this
requirement. I happened to be using a 2GB card and it works well.</p>

<h2 id="boot-in-linux-and-install-on-the-emmc-flash-memory">Boot in Linux and Install on the eMMC Flash Memory</h2>

<p>Place your SD card in the slot on the bottom of the Oragne Pi 3 LTS board.
Connect your monitor via HDMI and your keyboard using the USB ports. Apply power
to the USB-C connector on the board.</p>

<ol>
  <li>
    <p>After boot, log in with username <code class="language-plaintext highlighter-rouge">root</code> and password <code class="language-plaintext highlighter-rouge">orangepi</code>
 <img src="/wp-content/uploads/2023/02/orangepi-login.png" alt="Orange Pi boot screen" /></p>
  </li>
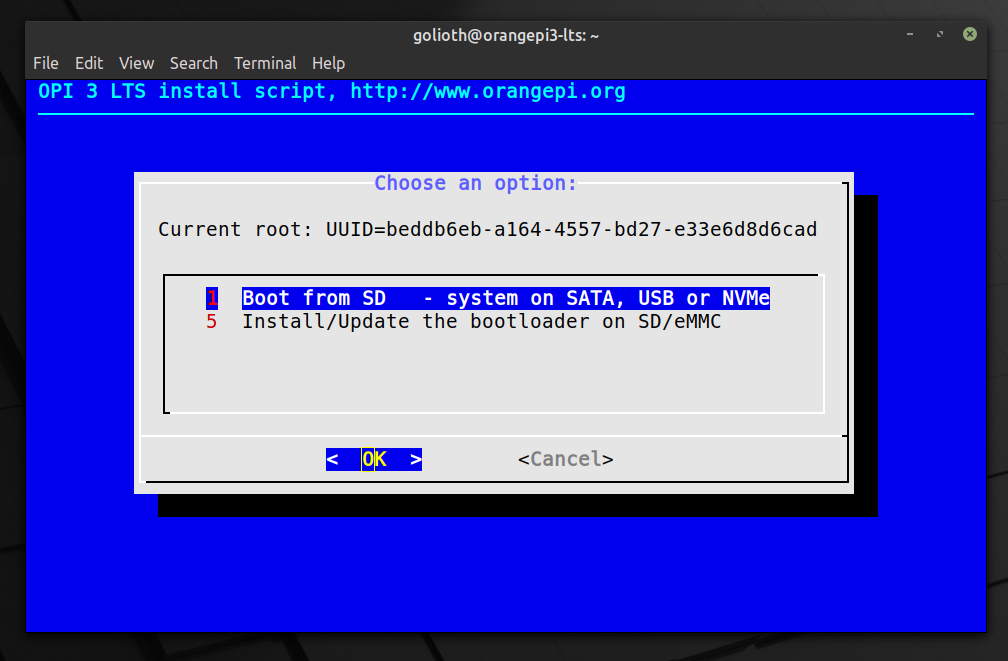
  <li>Type <code class="language-plaintext highlighter-rouge">nand-sata-install</code> to begin the installation process</li>
  <li>
    <p>Choose to boot from eMMC, choose <code class="language-plaintext highlighter-rouge">EXT4</code>, then accept the warning that the process will erase
all contents of the eMMC memory
 <img src="/wp-content/uploads/2023/02/orangepi-emmc-install.png" alt="eMMC install menu" /></p>
  </li>
  <li>After a few minutes you will be given the option to power down the board. Do
so and remove the SD Card.</li>
</ol>

<p>Installation of Linux on the eMMC is now complete</p>

<h2 id="bonus-connecting-to-wifi-and-fixing-the-dns">Bonus: Connecting to WiFi and fixing the DNS</h2>

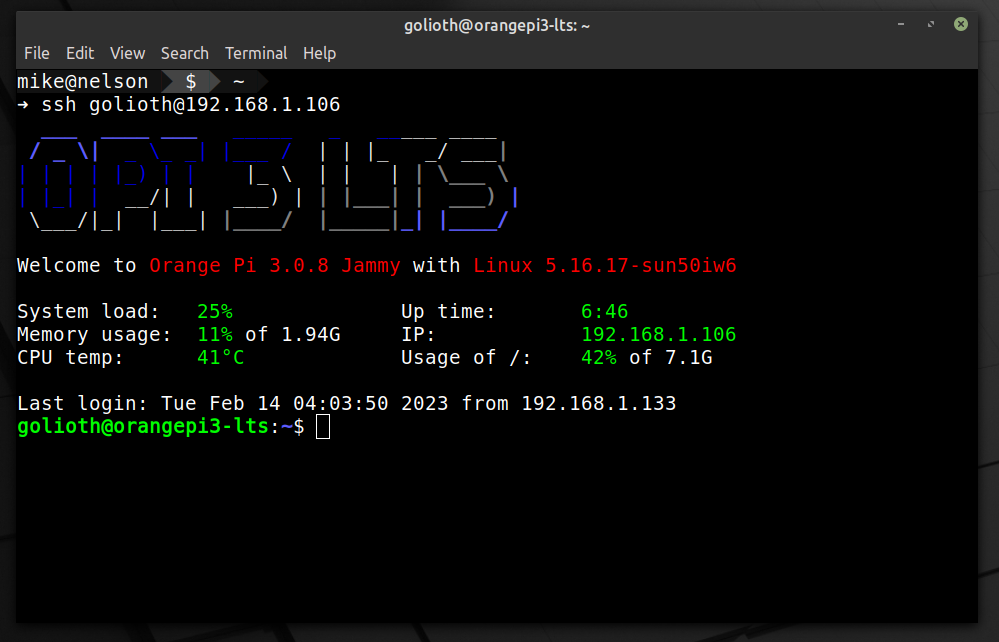
<p>At this point Linux is installed and working on the Orange Pi. You can boot the
board and log in with <code class="language-plaintext highlighter-rouge">root</code>/<code class="language-plaintext highlighter-rouge">orangepi</code>. If you are using an Ethernet connection
you likely already have internet working, but I only wanted to use WiFi. Let’s
step through the process of setting that up.</p>

<ol>
  <li>
    <p>Add WiFi to the network interfaces</p>

    <div class="language-shell highlighter-rouge"><div class="highlight"><pre class="highlight"><code> <span class="nv">$ </span><span class="nb">sudo </span>nano /etc/network/interfaces

 <span class="c">#Add the following to the bottom of this file:</span>
 auto wlan0
 iface wlan0 inet dhcp
 wpa-ssid your-wifi-ssid
 wpa-psk your-wifi-password
</code></pre></div>    </div>
  </li>
  <li>
    <p>WiFi will work after a reboot but my DNS wasn’t working. To fix this, edit
the systemd resolved configuration:</p>

    <div class="language-shell highlighter-rouge"><div class="highlight"><pre class="highlight"><code> <span class="nv">$ </span><span class="nb">sudo </span>nano /etc/resolv.conf

 <span class="c">#Add the folling to the bottom of this file:</span>
 search domain.name
 nameserver 8.8.8.8
 nameserver 1.1.1.1
 nameserver 1.0.0.1
</code></pre></div>    </div>
  </li>
  <li>
    <p>Reboot the board by typing <code class="language-plaintext highlighter-rouge">reboot</code>.</p>
  </li>
</ol>

<h2 id="wrapping-up">Wrapping Up</h2>

<p>The Orange Pi is now running from the onboard eMMC, it’s connected to your WiFi
network, and it’s able to use a DNS server for domain name lookup. There is
still some work to do. I recommend you add a public key for logging in over SSH
and disable password-based authentication. But that’s a post for another day.</p>]]></content><author><name>Mike Szczys</name></author><category term="Linux" /><category term="Tutorials" /><category term="Orange Pi" /><summary type="html"><![CDATA[It's impossible to buy a Raspberry Pi right now so my company is looking to the Orange Pi as an alternative. One perk is that these boards include eMMC memory so that the OS is stored on the board itself. Here's how to install Linux to the flash memory.]]></summary><media:thumbnail xmlns:media="http://search.yahoo.com/mrss/" url="/wp-content/uploads/2023/02/orange_pi_3_lts.jpg" /><media:content medium="image" url="/wp-content/uploads/2023/02/orange_pi_3_lts.jpg" xmlns:media="http://search.yahoo.com/mrss/" /></entry><entry><title type="html">Quick Tip: Git Global Exclude File</title><link href="/blog/2020-11-25-git-core-excludes/" rel="alternate" type="text/html" title="Quick Tip: Git Global Exclude File" /><published>2020-11-25T20:35:00-06:00</published><updated>2020-11-25T20:35:00-06:00</updated><id>/blog/git-core-excludes</id><content type="html" xml:base="/blog/2020-11-25-git-core-excludes/"><![CDATA[<p>This autumn I’ve completely switch over from using VScode to using Vim (neovim,
to be specific). The adventure has included solving myriad small annoyances and
this evening I just squashed another one.</p>

<p>I’m using Conqueror of Completion Vim extension. Since I’m working mostly in C,
I’ve installed clangd as part of this and it dumps a <code class="language-plaintext highlighter-rouge">.cache</code> folder into
each directory I’m editing. My initial reaction was to add the directory to the
Git ignore file, but that gets old really quickly. This evening I discovered you
can ignore file system-wide by using git’s <code class="language-plaintext highlighter-rouge">core.excludesFile</code> settings.</p>

<h2 id="how-to-use-gits-coreexcludesfile">How to use Git’s core.excludesFile</h2>

<p>Git’s core.excludesFile works the same way as any <code class="language-plaintext highlighter-rouge">.gitignore</code> file. Just add
the filename/directory patterns you want to ignore. The difference is that you
need to tell git where your system wide file is. Here’s my ignore file:</p>

<div class="language-yaml highlighter-rouge"><div class="highlight"><pre class="highlight"><code><span class="s">.cache</span>
</code></pre></div></div>

<p>With that in place, just set the value using this git command:</p>

<div class="language-shell highlighter-rouge"><div class="highlight"><pre class="highlight"><code>git config <span class="nt">--global</span> core.excludesFile <span class="s1">'~/.gitignore'</span>
</code></pre></div></div>

<p>Now it looks like the home directory is the recommended location for this, but I
ended up moving it to my dotfiles repo so I can share the file between systems.</p>

<p>Checkout <a href="https://git-scm.com/docs/gitignore">the gitignore docs page</a> for more
on this handy feature.</p>]]></content><author><name>Mike Szczys</name></author><category term="Quick Tip" /><category term="Git" /><category term="Vim" /><summary type="html"><![CDATA[One of my Vim plugins generates a .cache directory in every project. Instead of telling every git repo to ignore it, use the system-wide exclude file.]]></summary><media:thumbnail xmlns:media="http://search.yahoo.com/mrss/" url="/assets/images/gen/blog/git-core-excludes.webp" /><media:content medium="image" url="/assets/images/gen/blog/git-core-excludes.webp" xmlns:media="http://search.yahoo.com/mrss/" /></entry><entry><title type="html">Fixing Ryzen Freezes Due to C6 Power States</title><link href="/2019/04/19/fixing-ryzen-freezes-due-c6-power-states/" rel="alternate" type="text/html" title="Fixing Ryzen Freezes Due to C6 Power States" /><published>2019-04-19T16:39:03-05:00</published><updated>2019-04-19T16:39:03-05:00</updated><id>/2019/04/19/fixing-ryzen-freezes-due-c6-power-states</id><content type="html" xml:base="/2019/04/19/fixing-ryzen-freezes-due-c6-power-states/"><![CDATA[<p>Finally, I figured out how to make my system stable. For about a year I had been experiencing random freezes on my new system — but not ever while using it. I would come back in the morning and try to wake up the machine and it would be frozen. Turns out the root cause is the C6 power saving states in the Ryzen core are not fully compatible with the Linux kernel. Grrrr!</p>

<p>I’ll detail my fix here. I got on to this solution from <a href="https://forum.manjaro.org/t/ryzen-freezes-possible-solution-related-to-c6-state/37870/3">a thread on monjaro.org</a> and implemented it <a href="https://www.reddit.com/r/Amd/comments/7tkigu/automating_disabling_of_c6_states_in_arch_linux/">following this reddit thread</a>.</p>

<h2 id="clone-the-zenstates-repo">Clone the ZenStates repo:</h2>

<p>You can find it here: https://github.com/r4m0n/ZenStates-Linux</p>

<div class="language-plaintext highlighter-rouge"><div class="highlight"><pre class="highlight"><code>git clone git@github.com:r4m0n/ZenStates-Linux.git
</code></pre></div></div>

<h2 id="create-a-script"><strong>Create a Script:</strong></h2>

<p>I called my disable-c6.sh:</p>

<div class="language-bash highlighter-rouge"><div class="highlight"><pre class="highlight"><code>

<span class="c">#!/bin/bash</span>
<span class="k">if</span> <span class="o">[</span> <span class="s2">"</span><span class="k">${</span><span class="nv">1</span><span class="k">}</span><span class="s2">"</span> <span class="o">==</span> <span class="s2">"post"</span> <span class="o">]</span><span class="p">;</span> <span class="k">then</span>

<span class="c"># Disable c6 coming out of sleep</span>
/home/mike/compile/ZenStates-Linux/zenstates.py <span class="nt">--c6-disable</span>
<span class="k">fi</span>

</code></pre></div></div>

<p>Make it executable:</p>

<div class="language-plaintext highlighter-rouge"><div class="highlight"><pre class="highlight"><code>chmod a+x disable-c6.sh
</code></pre></div></div>

<p>Turn it into a service:</p>

<div class="language-plaintext highlighter-rouge"><div class="highlight"><pre class="highlight"><code>sudo nano /etc/systemd/system/disable-c6.service
</code></pre></div></div>

<p>and paste:</p>

<div class="language-plaintext highlighter-rouge"><div class="highlight"><pre class="highlight"><code>
[Unit]
Description=Disable C6 on boot
After=default.target

[Service]
Type=oneshot
ExecStart=/path/to/repo/ZenStates-Linux/zenstates.py --c6-disable

[Install]
WantedBy=default.target
</code></pre></div></div>

<p>Start it to disable C6 if it is currently enabled…</p>

<div class="language-plaintext highlighter-rouge"><div class="highlight"><pre class="highlight"><code># systemctl start disable-c6.service
</code></pre></div></div>

<p>And get it to run on boot</p>

<div class="language-plaintext highlighter-rouge"><div class="highlight"><pre class="highlight"><code># systemctl enable disable-c6.service
</code></pre></div></div>]]></content><author><name>Mike Szczys</name></author><category term="Misc" /><category term="1700" /><category term="C6" /><category term="freeze" /><category term="linux freeze" /><category term="random freeze" /><category term="Ryzen" /><summary type="html"><![CDATA[Finally, I figured out how to make my system stable. For about a year I had been experiencing random freezes on my new system — but not ever while using it. I would come back in the morning and try to wake up the machine and it would be frozen. Turns out the root cause is the C6 power saving states in the Ryzen core are not fully compatible with the Linux kernel. Grrrr!]]></summary><media:thumbnail xmlns:media="http://search.yahoo.com/mrss/" url="/wp-content/uploads/2019/04/ryzen-box-1-of-1-100712472-large.jpg" /><media:content medium="image" url="/wp-content/uploads/2019/04/ryzen-box-1-of-1-100712472-large.jpg" xmlns:media="http://search.yahoo.com/mrss/" /></entry><entry><title type="html">Custom Resolutions for Dell XPS 13 Running Ubuntu 16.04</title><link href="/2017/05/09/custom-resolutions-dell-xps-13-running-ubuntu-1604/" rel="alternate" type="text/html" title="Custom Resolutions for Dell XPS 13 Running Ubuntu 16.04" /><published>2017-05-09T11:01:41-05:00</published><updated>2017-05-09T11:01:41-05:00</updated><id>/2017/05/09/custom-resolutions-dell-xps-13-running-ubuntu-1604</id><content type="html" xml:base="/2017/05/09/custom-resolutions-dell-xps-13-running-ubuntu-1604/"><![CDATA[<p><a href="/wp-content/uploads/2017/05/ubuntu-with-new-resolutions-featured.jpg"><img src="/wp-content/uploads/2017/05/ubuntu-with-new-resolutions-featured.jpg" alt="ubuntu-with-new-resolutions-featured" /></a></p>

<p>I upgraded from a Chromebook to the Dell XP 13 (9360). The Developer Edition comes with Ubuntu 16.04 Xenial preinstall — which I love because it means this machine is counted as a Linux laptop and not as a Windows machine.</p>

<p>After installing the Cinnamon Desktop and doing a dist-upgrade the screen resolution settings were lacking. I could only choose 1920×1080 and 1360×768 as my 16:9 options. The former was tiny font, the latter was comically huge. And setting the scaling to 2 on the larger resolution looked horrible.</p>

<p>But this is why I really do love Linux. You can, of course, choose your own resolutions. It’s easy, and one set up they are chosen through the GUI tools just like normal.</p>

<h2 id="how-to-create-modelines-for-custom-resolution-in-linux">How to create modelines for custom resolution in Linux:</h2>

<p>I started by looking up <a href="https://pacoup.com/2011/06/12/list-of-true-169-resolutions/">a list of 16:9 resolutions</a>. I selected two that are perfectly divisible by 8: 1792×1008 and 1664×936.</p>

<p>The process for adding these resolutions comes from <a href="https://askubuntu.com/a/377944">thom’s askubuntu answer</a>. Use xrandr to create and add modelines. First, just run xrandr without any parameters to establish the name of your display. Mine is eDP-1</p>

<p><a href="/wp-content/uploads/2017/05/output-of-xrandr.png"><img src="/wp-content/uploads/2017/05/output-of-xrandr.png" alt="output-of-xrandr" /></a></p>

<p>Next, use cvt to generate the modeline for your target resolution</p>

<div class="language-plaintext highlighter-rouge"><div class="highlight"><pre class="highlight"><code>cvt 1792 1008
</code></pre></div></div>

<p><a href="/wp-content/uploads/2017/05/cvt-output.png"><img src="/wp-content/uploads/2017/05/cvt-output.png" alt="cvt-output" /></a></p>

<p>Use xrandr to add that resolution and assign it to the display. Notice for the second line we get the display name from our previous xrandr use, and the mode name from inside the quotes of the cvt output.</p>

<div class="language-plaintext highlighter-rouge"><div class="highlight"><pre class="highlight"><code>sudo xrandr --newmode "1792x1008_60.00"  149.50  1792 1904 2088 2384  1008 1011 1016 1046 -hsync +vsync
sudo xrandr --addmode eDP-1 1792x1008_60.00
</code></pre></div></div>

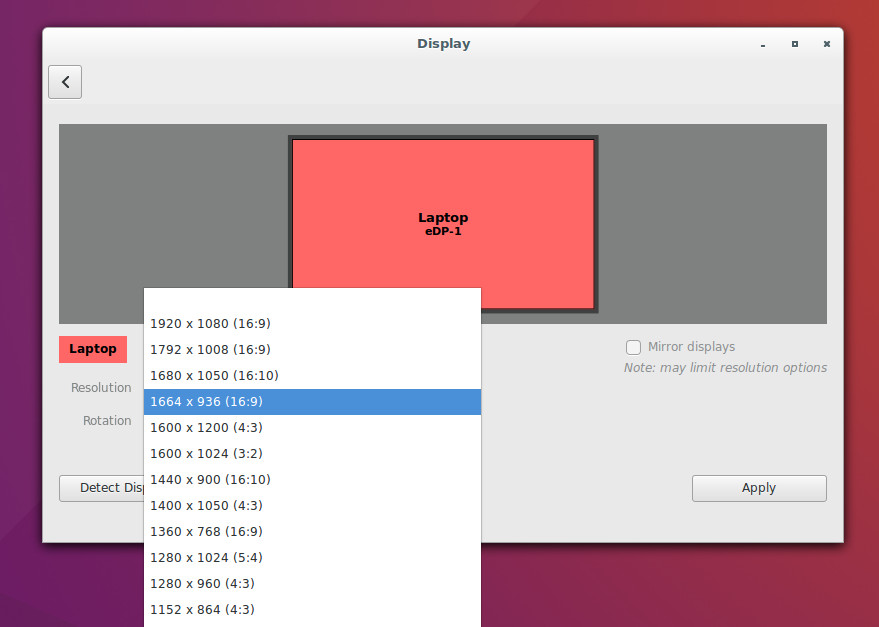
<p>Repeat this for any other resolutions you wish to add. Now when you load up the display settings you’ll have the new resolutions to choose from.</p>

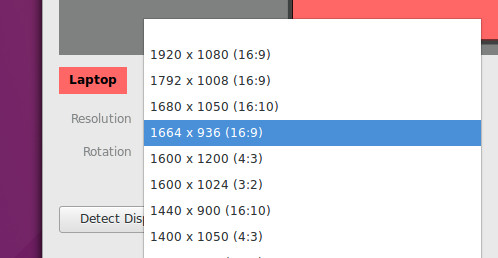
<p><a href="/wp-content/uploads/2017/05/ubuntu-with-new-resolutions.jpg"><img src="/wp-content/uploads/2017/05/ubuntu-with-new-resolutions.jpg" alt="ubuntu-with-new-resolutions" /></a></p>

<h2 id="make-it-permanent">Make It Permanent</h2>

<p>We’re not quite done yet. You need to make sure to make the changes persistent across reboots. Create the file ~/.xprofile and save your xrandr directives there. My file looks like this:</p>

<div class="language-plaintext highlighter-rouge"><div class="highlight"><pre class="highlight"><code>#!/bin/sh
xrandr --newmode "1792x1008_60.00" 149.50 1792 1904 2088 2384 1008 1011 1016 1046 -hsync +vsync
xrandr --addmode eDP-1 1792x1008_60.00
xrandr --newmode "1664x936_60.00" 128.50 1664 1768 1936 2208 936 939 944 972 -hsync +vsync
xrandr --addmode eDP-1 1664x936_60.00
</code></pre></div></div>]]></content><author><name>Mike Szczys</name></author><category term="Ubuntu" /><category term="cvt" /><category term="Dell XPS 13" /><category term="linux" /><category term="modeline" /><category term="resolution" /><category term="xrandr" /><summary type="html"><![CDATA[]]></summary></entry></feed>