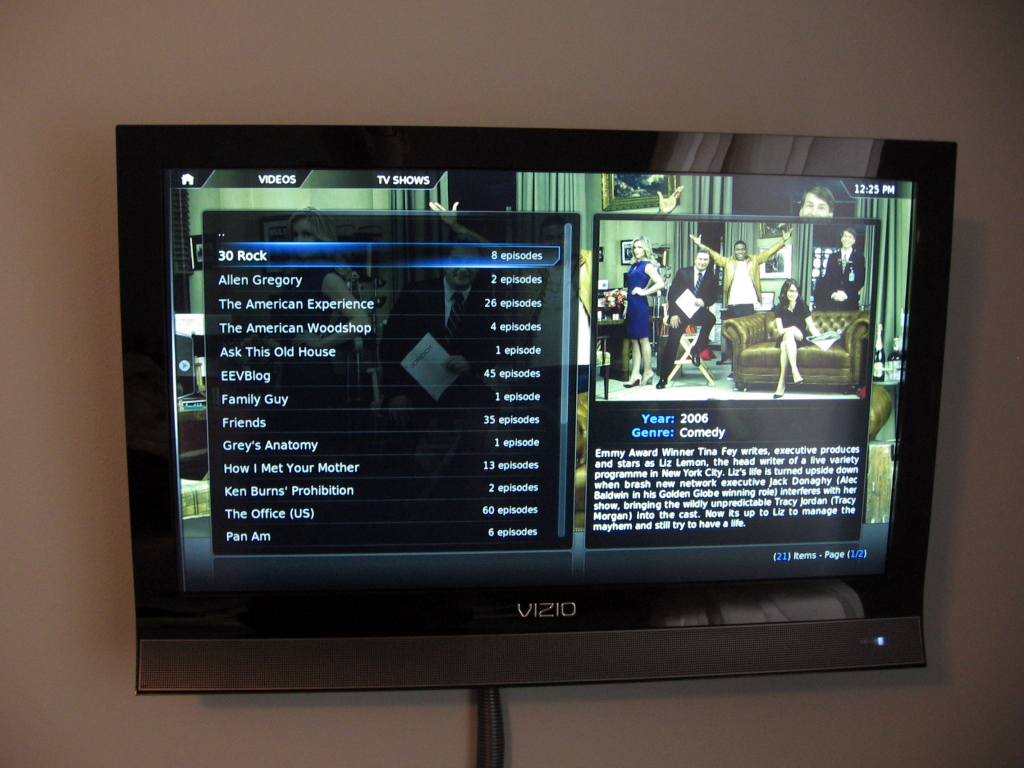
Amanda and I finally cut the cord about two years ago, after having spent quite a bit of time developing a replacement for Cable television. We started to realize that many of the shows we watched were on broadcast television, and others we could wait for on DVD or watch legally online. Since cutting the cord we’ve never had any regrets and it’s because we always have something on the server to watch.
My setup uses one server running MythTV to record shows from an antenna I built. Those shows are transcoded and stored on a networked folder to be played back by various front end hardware running XBMC. After the break I’ll share all the hardware and software details that make this happen.
What goes into this setup:
- An HD antenna (self-made in my case)
- A networked computer to record and serve the library
- ATSC tuner card(s)
- Big HDD (1 gig per hour — I use 1 TB)
- Device that runs XBMC at each television
- Ubuntu
- Self-compiled version of FFmpeg
- Transcoding script
- MythicalLibrarian to manage library
Capturing the air waves
You’re going to need an antenna. There are an unbelievable number of choices on the commercial market, but if you live in a city of any size at all you might be able to get great signal using stuff you have around the house. I built my own coat hanger antenna and only spent about $7 on some hardware and a coax connector.
I simply followed the Make Magazine instructions (PDF). They even covered the build in one of the Make TV episodes which is where the image above came from. Unfortunately, I didn’t take any pictures of the Antennas I built. Mine is now in the Attic where it feeds the coax network throughout my house and the rest of them I gave away to other cord cutters.
On the East side of Madison I get at least 13 channels. All of them are crystal clear except two of them when it is stormy. The signal works with anything that has an ATSC digital television tuner (all modern flat panels do) and I don’t need any amplification to distribute the signal to all rooms of the house.
The Recording Hardware and Software
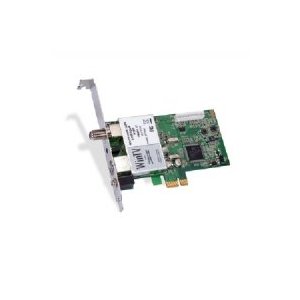 ATSC is the television standard for digital broadcasts and it’s already a compressed format. This means it’s incredibly easy to record since the signal doesn’t need to be encoded as it did with NTSC analog cable recording.
I use dual ATSC tuner cards in order to record more than one show at a time. They are both PCI express cards so you’ll need to have one slot available for each card if you go this route. I have been very happy with my Hauppauge 1250 tuner cards.
Both cards are automatically recognized under Ubuntu 11.10 Oneiric Ocelot. This operating system makes it a snap to install MythTV, which is responsible for recordings.
Note: You will need to pay a subscription fee to easily use MythTV. This is because the software needs to know about the broadcast television schedule information in your area and this information is not free (at least not in an easily and automatically usable way). Luckily, some MythTV supporters got together and started a non-profit service that provides this info for $25/year called Schedules Direct.
Installation and setup of MythTV is a tutorial in itself and I won’t cover it here. I will talk about extra steps to transition MythTV recordings over to an XBMC controlled library. Keep reading for that.
Transcoding recordings
1080i video can be huge! For instance, it’s not uncommon for one hour of video to be 6 GB. I’m not a stickler for this level of quality, and am quite happy with DVD quality. For me, this is also necessary because not all of the hardware I use to watch these recordings can handle video of this quality.
I’m using a script to automatically transcode to DVD quality. The original files are saved, in case there was an issue with the conversion. I clean those out manually from time to time, but you can set up a cron job to do this if you’re so inclined.
You probably want to compile your own version of FFmpeg. The version available in the Ubuntu repositories has a bug that will very occasionally crash the process if the recording has signal interference (remember, you’re using an antenna for the source so there may be slight glitches in the signal) but it’s been fixed upstream. This is quite easy, even if you’ve never compiled anything before. That’s because the Ubuntu forums have a fantastic thread that shows every command necessary to pull this off. I’m very comfortable compiling source but I’m in the debt of FakeOutdoorsman because his guide is so useful!
I based my script off of a MythTV script that was intended to automatically remove commercials. It is very good at keeping a backup and returning error codes (which is why I modified it for my uses). Syntax is easy enough, and I’ll get to that later when we work on adding a user job to MythTV to automate this. For now, download the file directly, or grab it from my Github repository. Save the file to the mythtv home directory (/home/mythtv).
Moving recordings to an XBMC-friendly library
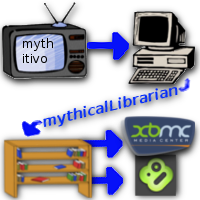 XBMC has a great scraper for grabbing thetvdb.com data such as art-work, episode titles and descriptions, info about the cast, and more. We just need to have the files named correctly and in a hierarchy which XBMC can understand. This is a huge amount of work to do by hand, but luckily my friend Adam Outler wrote an amazing piece of software called Mythical Librarian that will do it for you automatically.
To get the script up and running, first make a directory on your big hard drive, make the mythtv user (automatically created when you installed MythTV) the owner, and set the appropriate permissions:
sudo mkdir /BigHardDrive/videoLibrary
cd /BigHardDrive/videoLibrary
sudo mkdir TV Movies Showings
sudo chown -R mythtv:mythtv /BigHardDrive/videoLibrary
sudo chmod -R 775 /BigHardDrive/videoLibrary
This creates a drive that will store the three different types of recording categories that Mythical Librarian uses, changes the owner and group to MythTV, and gives full access to the owner and group members. This will be important later so that recordings can be deleted via a network share once you’ve watched them.
Next follow the automatic installation on Linux instructions for MythicalLibrarian. Here are the answers that I chose along the way. You should actually think about them and learn what you’re doing, but I know… you just want to get this over with:
- library-notify-send – NO
- Build
- mythicalInterface – should be MythTV0.24 if you’re using Ubuntu 11.10
- Use Defaults – NO
- End File Location – Manually choose Folders
- (Now select the TV folder you just created)
- SymLink – NO (we want to control the recordings using XBMC)
- Database Type – YES
- MySQL name – OK (should be mythtv by default)
- Enter your MySQL password – OK (default should be auto detected)
- Enter you DB host IP – OK (should be localhost in most cases)
- Enter your MythTV PIN – OK (should be 0 by default
- (Now select the Movies directory you created before)
- Unrecognized programming – No (I’ve never had good luck with this feature so I don’t use it)
- (Now select the Showings directory you created before)
- Enter your Desktop username – OK (this probably doesn’t matter)
- Desktop Notifications – No
- XBMC Notifications – No
- Enter the username of the person who will run MythicalLibrarian – OK (should be mythtv by default)
Whew, that was a lot. The package will now run some tests. A couple of them will fail (Desktop notifications and XBMC notifications because we didn’t enable them). But the directory tests must succeed or you need to fix your permissions and try again. This is why I shared the commands for setting up the storage directories!
With that set up (this was one of the more confusing parts so great job getting through it!) we can create some user jobs to make this automatic.
MythTV user jobs
Once a recording has been stored on the hard drive, MythTV has the ability to automatically execute commands related to that file. First we need to set up a couple of User Jobs.
Enter the setup program for mythtv by typing this at the command line:
mythtv-setup
You’ll be warned that the backend must be closed to run setup. This is fine as long as you’re not currently recording something.
Press enter when “1. General Setup” is highlighted. Press enter until you get to the tenth screen where user jobs are setup (there’s an image of this below). You need two user jobs, it doesn’t matter which ones you use, as long as the transcoding job is above the mythical librarian job. For User Job #1 I have a description and command of:
Downsample to DVD quality
/home/mythtv/1080-to-dvd.sh %DIR% %FILE% %CHANID% %STARTTIME%
For User Job #2 I have a description and command of:
Mythical Librarian
/usr/local/bin/mythicalLibrarian "%DIR%/%FILE%"
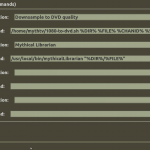 Press enter until you get back to the main screen. Press escape to exit. You do not need to run mythfilldatabase at this time.
We’re nearing the finish line. Next you need to make sure the files are available on the network.
Setup samba
Setting up the server packages is an easy one-liner:
sudo apt-get install samba
Next add mythtv as a samba user
sudo smbpasswd -a mythtv
Setup your samba folder configuration using your favorite text editor (I used gedit):
sudo gedit /etc/samba/smb.conf
And copy this to the bottom of the file (change the path to directory locations you created earlier):
[Recordings]
path = /BigHardDrive/videoLibrary
public = yes
writeable = yes
available = yes
browsable = yes
Finally, restart the samba server:
sudo restart smbd
Samba is a network file sharing system that pretty much everything supports these days. We’ve shared the recording library folder using that protocol without any type of password security. This is fine if you’re behind a hardware firewall like a wireless router. It’s not a bad idea to think about your home network security at this point, but I won’t cover that here.
Install MythWeb to manage your recording schedule
sudo apt-get install mythweb
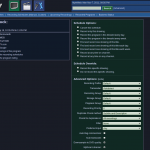 This one-liner will install mythweb. Once done, you can go to http://YourMythTVServerIP/mythweb to schedule recordings. Notice in the screenshot I’ve check the box next to the User Jobs we’ve set up. This is what makes this whole thing automatic and needs to be done for each program you set to record (no each episode… just each TV show).
When I set up the user jobs before I made sure that the transcoding job was above the Mythical Librarian job. Here you can see the same order. Whichever command is higher on the list will be executed first. We don’t want to run the Mythical Librarian command first because it moves the files and removes the meta info from MythTV. This would make it impossible for MythTV to automatically run the transcoding operation afterwards.
This completes the server-side setup. All that’s left is to find something that can play from your well-organized library of recordings.
Configuring XBMC
 XBMC is an open source media player. It works on a huge number of devices, including computers running Linux, OSX or Windows operating systems, Apple TV 1 and 2, iOS devices like iPad, iPhone, and iPod touch, the Boxee Box, and others. Download a copy for your device and install it.
Note: I installed XBMC for Ubuntu 11.10 Oneiric Ocelot from a PPA:
<pre style="padding-left: 30px;">sudo add-apt-repository ppa:nathan-renniewaldock/xbmc-stable
sudo apt-get update
sudo apt-get install xbmc
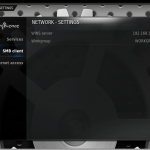 First, let’s setup the general network features that will make it easier to use the samba shares setup earlier. Got to:
System –> Network –> SMB Client
and enter the IP address of your MythTV computer in the ‘WINS’ server field
Next navigate to:
System –> Video –> Library
and choose “Update Library on Startup”. This way, every time you start XBMC to watch a program, newly recorded shows will be automatically added to the library.
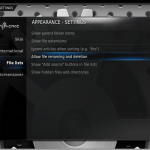 The final setting you’ll want can be found at:
System –> Appearance –> File Lists
Make sure you add a check mark to the box next to “Allow File Renaming and Deletion”. This will allow you to delete programs in the library after watching them by pulling up the menu and choosing “Remove from Library”. A secondary prompt will ask if you also want to remove the file. If you aren’t asked about file removal, it’s because this option wasn’t chosen.
Adding your shares to XBMC
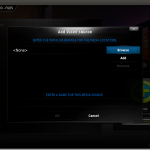 This is it, the final step. Everything should now be in place for your system to work, but you need to tell XBMC where the recordings are stored.
From the main menu of XBMC choose “Video”, then select “add source”. When asked to enter the path to your content click the Browse button to the right.
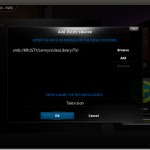 From the list presented choose “Windows Network (SMB)”, then navigate through the folders until you get to the directories which we set up during the samba configuration part of this tutorial. Remember when we created a TV, Movies, and Showings folder? You want to create a separate source for each, and give them a name which will be displayed on the XBMC menu. To the right is a screen capture of what my Television source looks like. Note that your path will be different from mine.
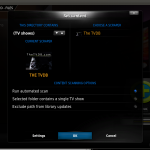 The next screen will let you choose what type of content this folder contains. Choose what’s appropriate, in this case I’ve selected TV Shows and am using the recommended ‘The TVDB’ scraper. Make sure to put a check in the “Run Automated Scan” option so that XBMC starts looking for TV Shows right away.
Conclusion
If you’ve made it this far, congratulations! Things have gotten so much easier over the years, but your first setup process is always a big undertaking.
You should now be able to navigate, watch, and delete your shows from the sofa. New recordings can be scheduled using a computer by loading up mythweb. And don’t forget that XBMC has a ton of Video Add-Ons that will let you watch content from the Internet
I’ll leave you with one pro tip. If you use XBMC in multiple locations in your house, deleting a recording from the library on one piece of hardware will not remove it from the others. You need to clean the library to do that. It is possible to do this automatically, but there are some gotchc’s that made that process too much for this tutorial. Check out the wiki if you are comfortable setting that up yourself.


